
Big Beautiful Doll finished

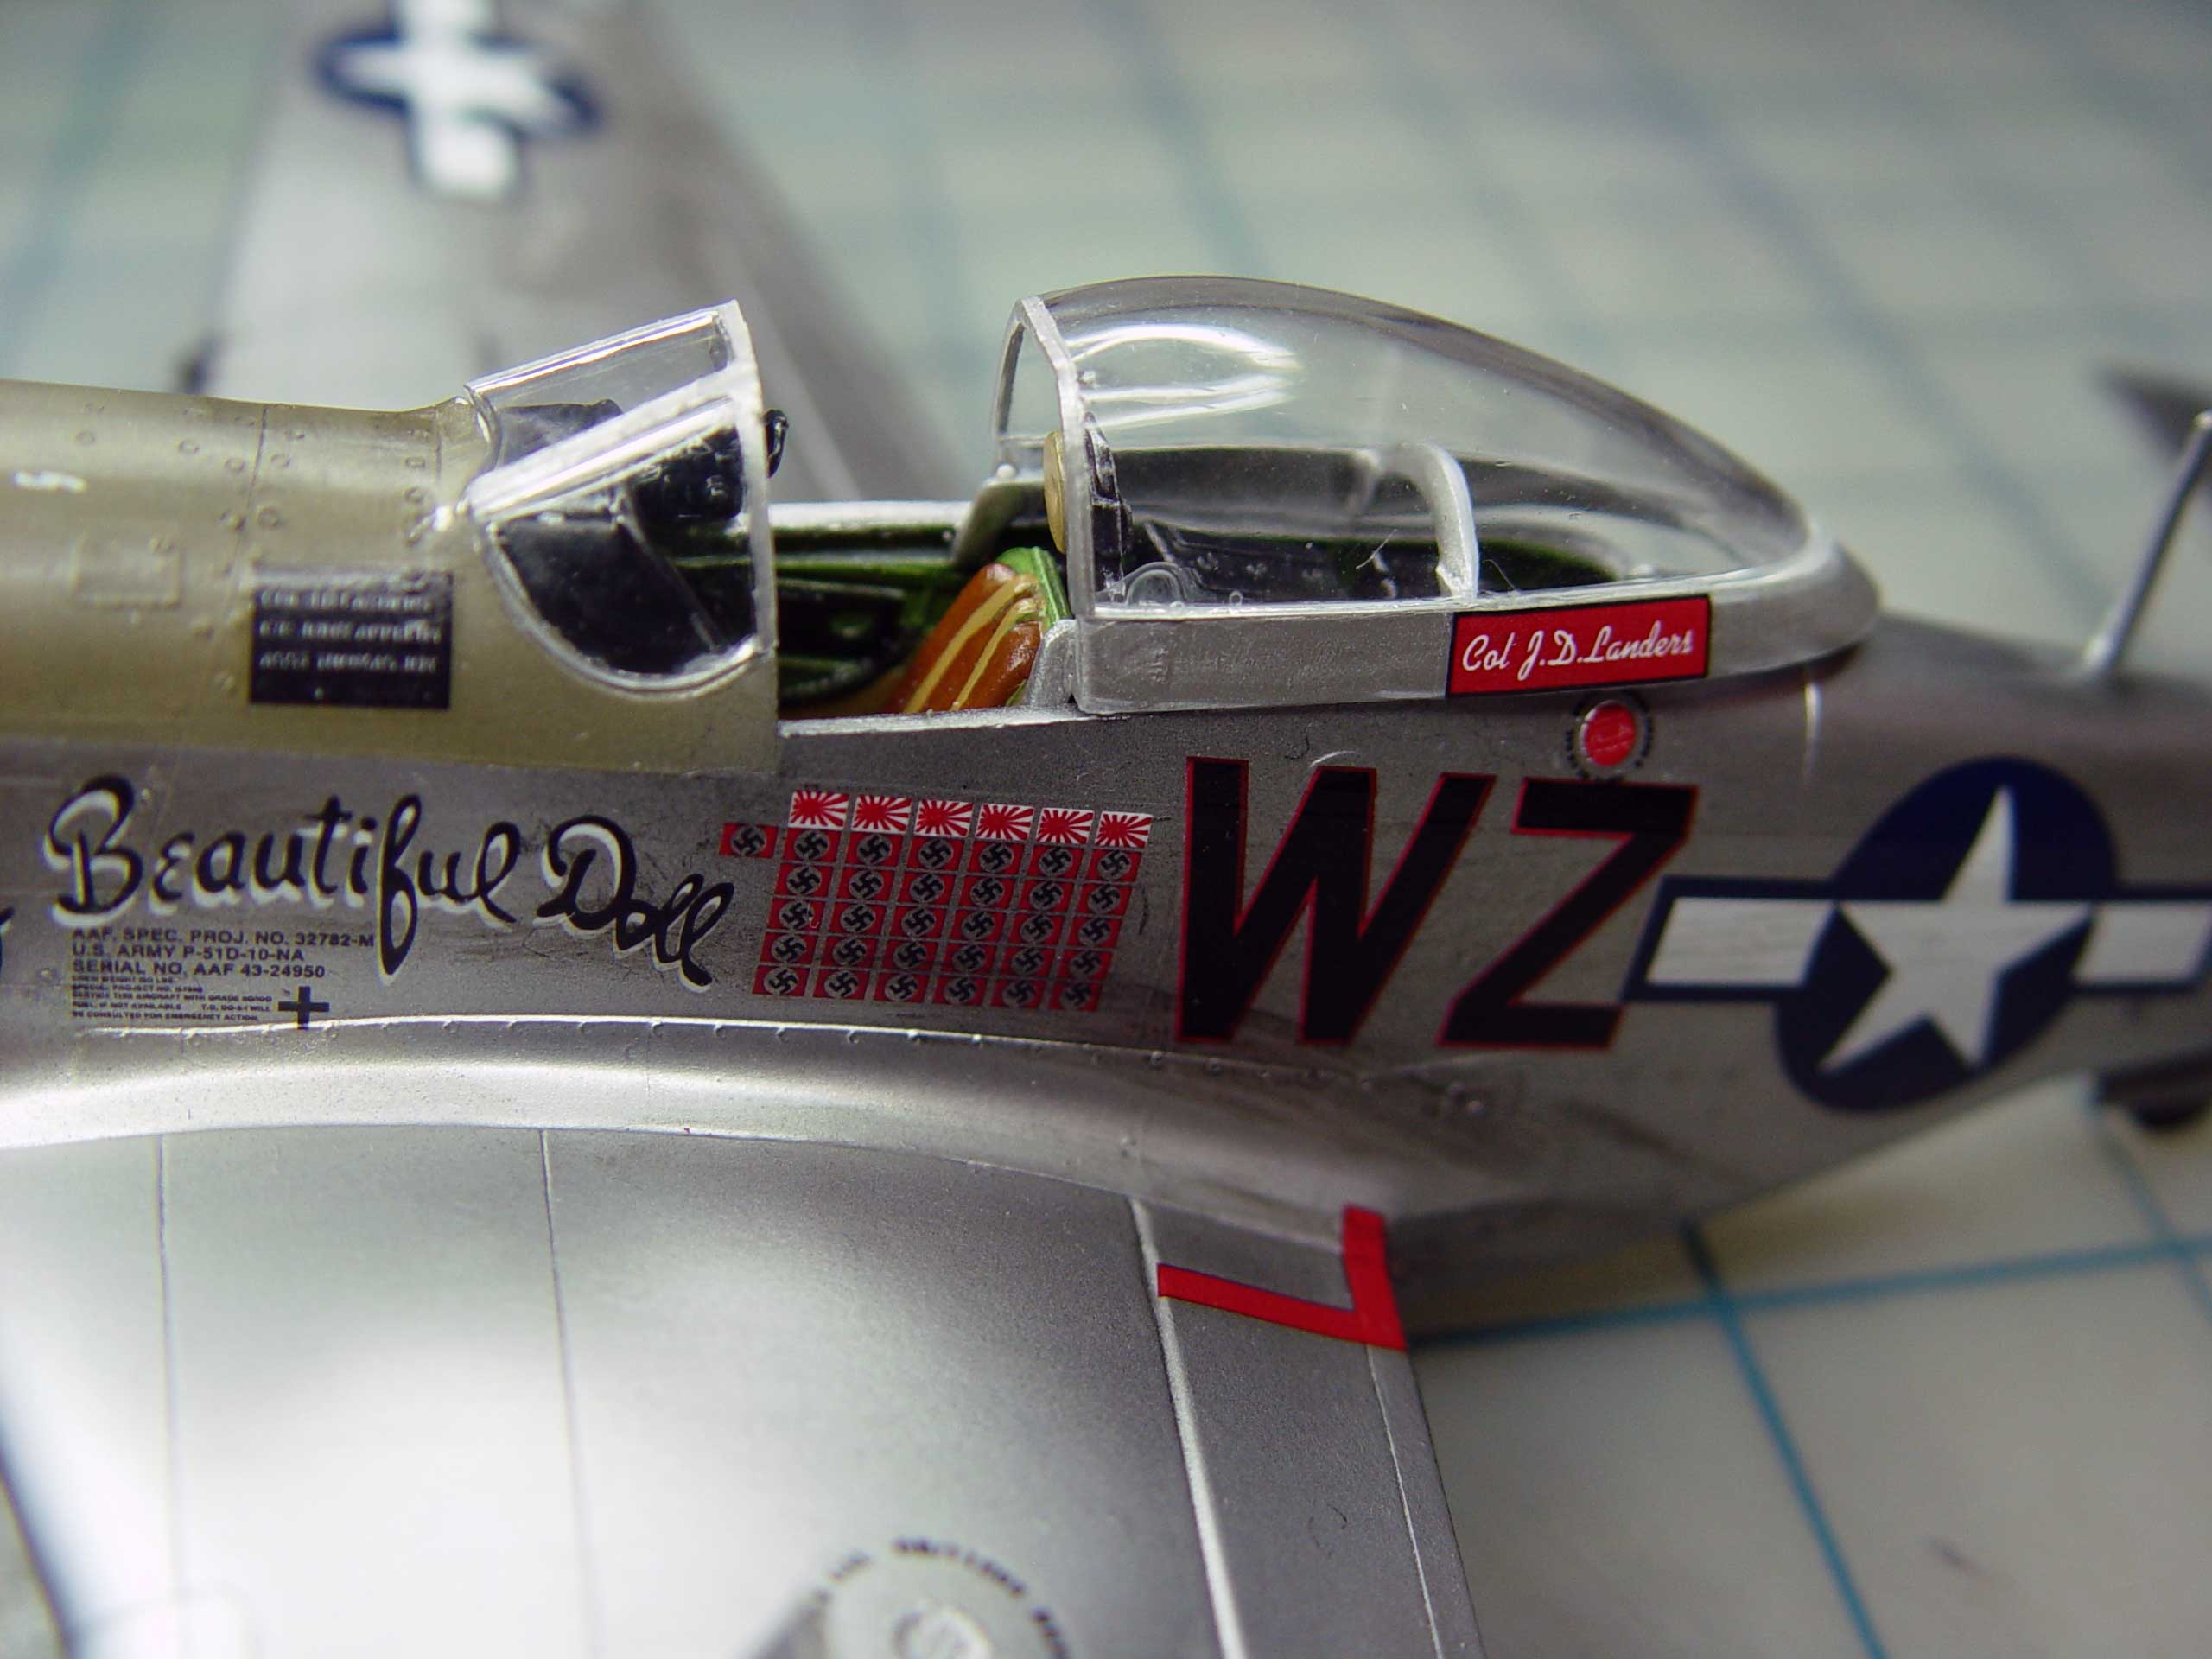
My P-51D build is finally done, but discerning eyes might notice that the Hasegawa Jumpin’ Jacques model has been transformed into Revell’s Big Beautiful Doll (but still 1/48th scale), which many people consider one of the most beautifully decorated P-51s in World War II.
Unfortunately there is a very sad story related to to this model as the actual plane crashed in 2011 at an airshow in Duxford, England, although fortunately the pilot survived. I do not believe the plane that crashed was the original Big Beautiful Doll, flown by Col. John Landers with the 357th Fighter Group during World War II. I think Landers flew more than one plane painted as Big Beautiful Doll, and there is a P-51D hanging at the Imperial War Museum in London painted in the colors of Big Beautiful Doll.
My tale of woe pales in comparison. My first attempt at the Hasegawa model ended in failure thanks largely to an adverse reaction to the Walther’s SolvaSet decal softening solution. The invasion stripes on the wings wrinkled after the SolvaSet but never unwrinkled and while trying to solve the problem by sanding off the decal and repainting, I managed to place a thumbprint in the still wet paint. I decided that the modeling gods didn’t want me to finish that model and decided to try again. The 1/48 Hasegawa kit is out of production (replaced by a 1/72nd scale Jumpin’ Jacques) and I didn’t want to spend much money anyway, so I bought the Revell kit for a very low price.
The Revell kit doesn’t have the fit and finish of the Hasegawa kit, of course, and I viewed it as a fun kit where I wouldn’t need to sweat the details. What I discovered, however, is that the Revell kit has a lot to offer and would be a great kit if it weren’t for the raised panel lines.
Some suggestions
 Forget about the option to open up the machine gun bays on the port wing, not unless you want to spend money on buying resin and photo-etched parts. The kit supplied guns and the molded in ammo belts are too lacking in detail to display. (I did open the bay but have strategically posed the covers to prevent a direct look.) The same is also true of the cowling directly below the engine that is a separate piece. You might as well glue it in place (which I did) rather than reveal the softly molded engine detail.
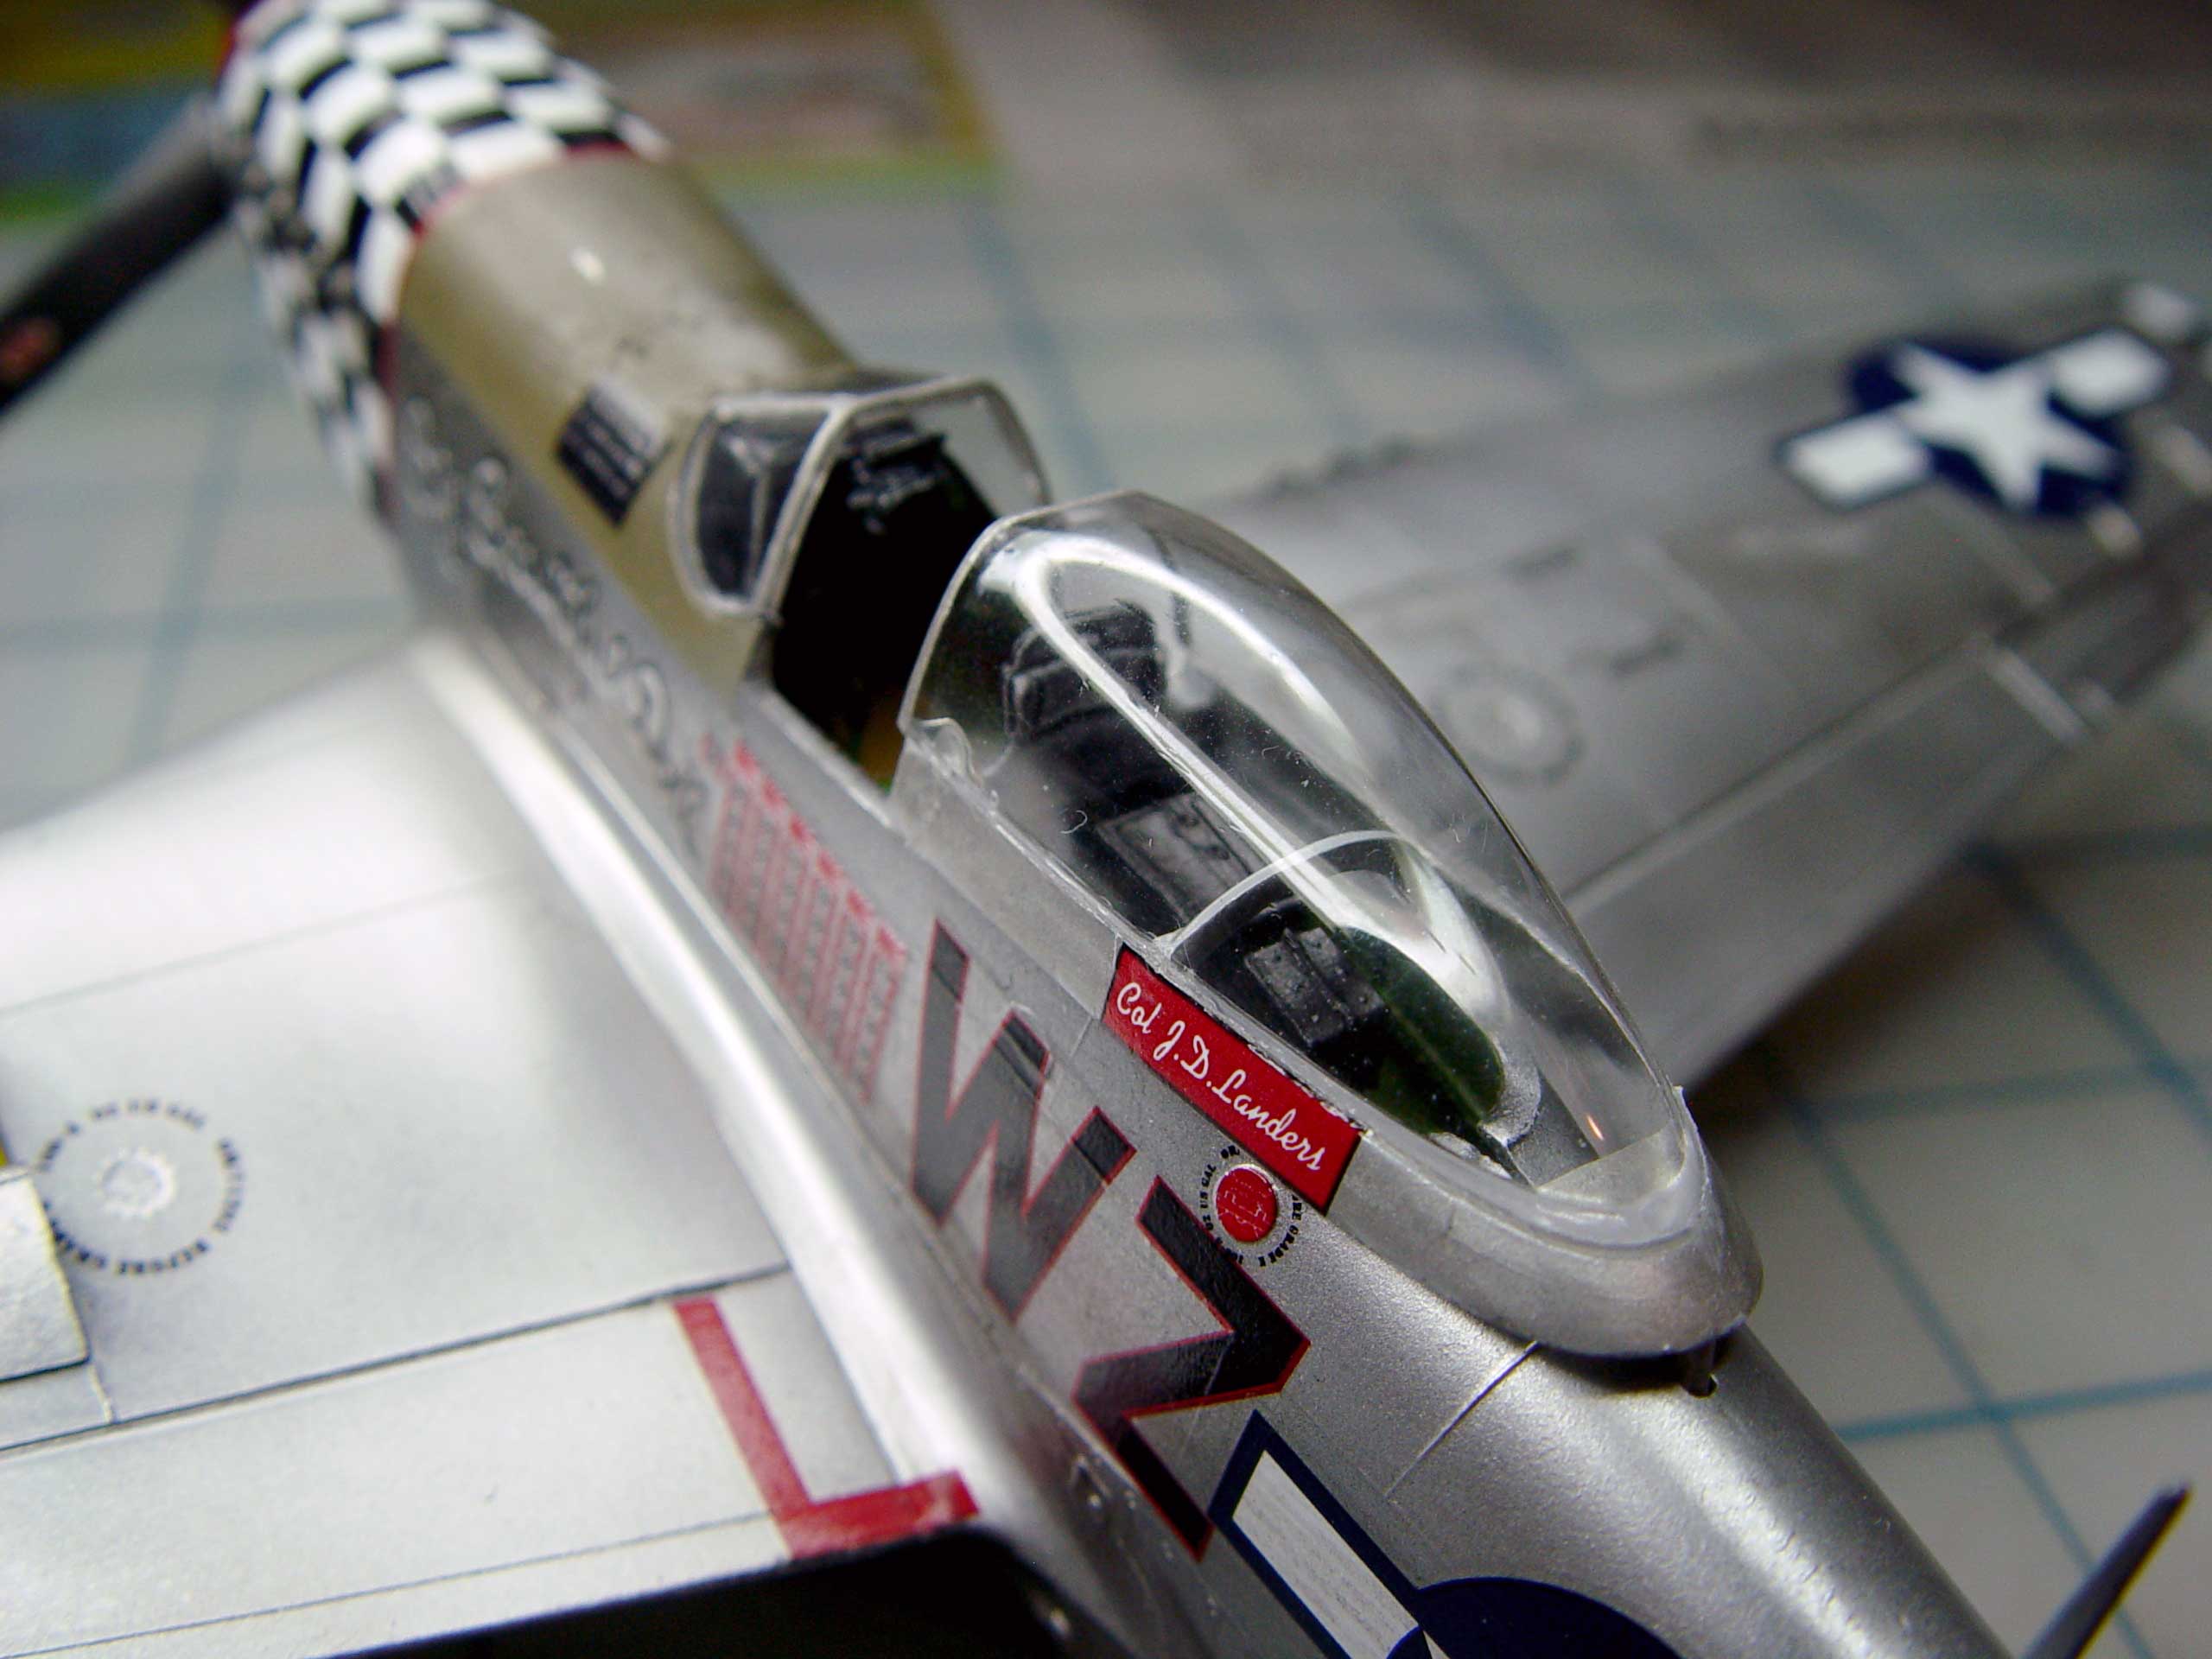
The cockpit tub is decent, however, although the floor doesn’t extend the whole width of the fuselage. Fortunately you can’t see that looking in through the open canopy. The bubble canopy, by the way, is a thing of beauty. It’s crystal clear and tracks are provided to allow it to slide back. The canopy comes in two pieces, however. The clear plastic must be joined to a gray plastic base and it would be a lot easier if it were simply one clear piece (as it was in the Hasegawa kit) and you just painted the base.
When I joined the canopy to the base, I noticed there was a little stair step, which I didn’t bother to sand off and which is also why the canopy is left open. I really should have superglued the canopy to the base and used the trick of coating the canopy with Future, which prevents the superglue from crazing the plastic (or so I read in FineScale Modeler).
I did bother to suggest instruments on the inside of the cockpit tub (painting levers and cables, etc.) but the effort is largely invisible. Decals for the instrument panel would have been nice, but were not included. I painted the panel black and dropped some white on the dial faces, which gives a good, if inaccurate, effect.
Mistakes
I made two big mistakes on this model and as usual they’re related to decaling. I did remember to test the effects of MicroScale Micro-Set and Micro-Sol and SolvaSet on spare decals (decals are provided to build either Big Beautiful Doll or Miss Marilyn II) and I detected no adverse effects. What I failed to realize is that the various setting and softening solutions had no effect on the decals, which became evident when I tried to apply the large checkerboard decal around the nose of the plane.
The instructions do show you’re supposed to make some cuts in the decals to match the curve of the cowling, but the raised panel lines and dzus rivets around the engine made it impossible for the decal to snuggle down, even with copious amounts of Micro-Sol and SolvaSet. I did make several pin pricks to let air out and solution in, but even that didn’t work reliably. These are remarkably resilient decals. I even successfully moved the star and bar on the starboard side of the fuselage after it had largely set (I had mistakenly thought the starboard side markings should also read WZ-I; I now know better but my mistake is permanent).
Should I attempt this model again, I would cut the checkerboard decals into strips two-block wide, which would be a bugger to align but should avoid the wrinkling problem.
Although the box art and most photographs show the name of the plane with a red drop shadow, the two-part decals provided had a white drop shadow. Aftermarket decals would probably solve this problem. The white of these decals, by the way, is sufficiently opaque. The white in the stars and bars of the Hasegawa kit were not, which proved a problem when they were overlaid on the invasion strips.
My second big mistake was related to the ModelMaster Metalizer Buffing Aluminum Plate lacquer paint I applied. I forgot to apply the sealer and instead went straight to two coats of Future before applying decals. The copious amounts of SolvaSet I was using to make the decals settle eventually worked through the Future (I should have let it cure for two days instead of one) and reacted with the Metalizer, which you can see on the starboard wing (but not in my picture). Presumably the sealer would have protected the Metalizer.
Metalizer
This model (and the failed Hasegawa kit) were my first attempts at metallic paints. I’d always shied away from lacquer-based paints, but I have to say I was quite pleased with how easy it is to spray and how quickly it dries. It is incredibly thin and easily spills, however, so I ended up with fingers dipped in liquid metal. It also requires ventilation and a proper mask.
On the Hasegawa kit, I applied the ModelMaster Metalizer Buffing Aluminum Plate over Tamiya primer and was pretty pleased with the results, but on the Revell kit, I sprayed the Tamiya primer, then Alclad II Gloss Black Base and then the Metalizer. I think the Alclad primer was unnecessary. Were I to do this kit again, I’d use Alclad chrome on the fuselage to match the pictures of the plane that crashed in 2011. Pictures show a highly reflective fuselage.
The Revell plastic, by the way, is not as flawless as the Hasegawa kit. There were many sink marks and in a few spots the plastic had a slight texture. I’d recommend giving the plastic a once over with super fine grade sandpaper.
Raised detail
Of course then you’d be removing the raised detail, including the panel lines, but you’ll probably have to do this anyway when trying to remove the seams caused by joining the wing and fuselage halves. I took this as an opportunity to replace the erased detail with a scribing saw, but I think I used a heavy hand. The scribing saw is great for adding panel lines in difficult curved areas, but something like the Tamiya scribing tool would probably be a better tool for making long straight lines. I replaced the missing rivet detail with my homemade riveting tool, a hypodermic needle ground flat in a pin vise.
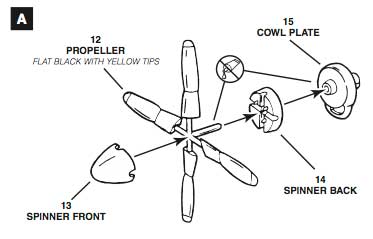 Propellor
The propellor assembly is, like the canopy, another unnecessarily complicated bit. I did appreciate that the four blades are pre-attached so you don’t have to worry about getting the correct pitch, but making the cowl plate a separate piece means you have to glue it to the fuselage and worry about seams. I decided to just let the intricate checkerboard decal hide any imperfections, which it largely did.
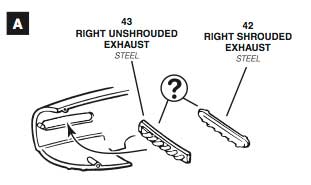 Two kinds of exhaust
The kit comes with two kinds of exhausts, shrouded and unshrouded, and the instructions offer no clue which to choose. I chose unshrouded, which because of a locator pin, clicked neatly into place, but later I realized the exhausts were pointed at a 90° angle to the fuselage. They should have been angled down slightly, so I had to pry them off and reattach. Unfortunately this was after the fuselage halves had been glued together, which made it a difficult operation.
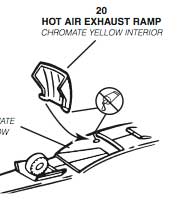 Hot air exhaust ramp
The hot air exhaust ramp appears designed to be able to pivot, but on my model the fit wasn’t tight enough to keep it from flopping straight down, so I glued it in place. Leaving it open also makes the lack of interior detail a little too obvious.
Drop tanks
The worst seam to fix arose on the “paper” drop tanks, so I chose to use the smaller 75-gallon tanks from the Hasegawa kit. I really should have added some wire to represent the gas hoses from the tanks to the wing, but I was largely building out of the box.
Weathering
I did some very limited weathering, mostly adding smoke to the panel lines and also just an overall dirty wash. I would dearly love to try out the washes from Flory Models (available at Sprue Brothers). Being able to simply wipe away excess wash would be marvelous.
New tool
 I did use a new tool on this build—Testor’s Model Car Spray Set No. 9215. It’s a dead simple cap you attach to a can of airbrush propellant. A plastic lid is provided that will screw onto a standard 1/2 oz bottle of ModelMaster paint, or you can decant paint into the spare bottle provided.
It’s a quick way to spray without the hassle of using your airbrush, especially for something simple like spraying flat black on wheels or zinc chromate on the cockpit tub. It’s not a fine spray pattern and I’d recommend mixing the paint thoroughly because the feeder tube goes straight down to the bottom of the bottle and will easily clog.
In conclusion
Overall, the Revell kit could be a nice kit, if you take the trouble to sand down the raised detail and rescribe. It would be fun to use aftermarket parts or scratch build detail, such as the tail radar antenna and attach stretched sprue from the main antenna to the wing (but not if you’re doing the modern version of the plane). I really would like to tackle this kit again, but I’m more tempted by Tamiya’s 1/32 scale P-51, of which there’s a nice build in the January 2014 edition of FineScale Modeler.