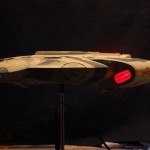
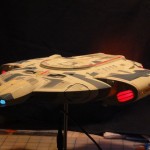
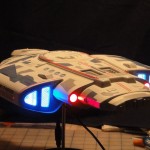
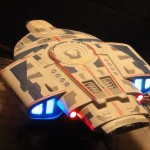
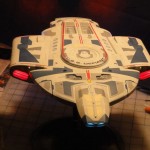
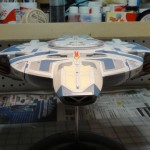
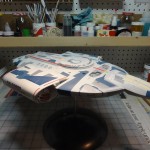
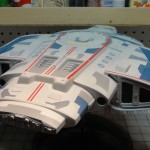
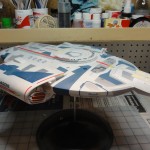
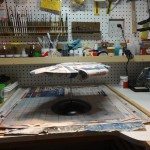
Another tough little ship, the USS Defiant from Deep Space Nine
For those who wonder what I’m doing when I’m not writing or woodworking, here’s the answer. I bought the USS Defiant model about Christmas 2014 and have been working on it since. Anyone familiar with the model will know that it’s an absolute bear to build because the upper and lower halves of the ship do not fit together well, and when you’ve added resin parts and lighting, it’s difficult to seal the ship up without lots and lots of putty.
She’s breaking up
 One of the big structural flaws with this model is that the interior of the ship is unsupported, meaning that it’s far too easy to squish the top and bottom together. If that happens, you’ll likely break the seams you had so carefully puttied. I solved this problem by gluing a section from a plastic cylinder (actually a plastic downspout from a sink drain) to the top and bottom of the model as I sealed it up. It goes right from what may be the bridge down to the shuttle bay and adds needed support for the power supply jack.
I also reinforced the seams by gluing a strip of styrene to the inside edges of the lower hull. That strip would later be glued to the top half of the hull by the application of copious amounts of thin cement. It had the added benefit of being a light block.
Resin pieces from Don’s Light and Magic
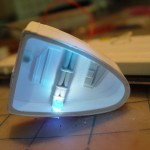
I bought the clear lighting parts from Don’s Light and Magic, which made lighting much easier (please don’t retire, Don). I used the clear bussard collector and deflector pieces, but I didn’t use the blue pieces for the warp field grills because I saw the studio model actually has an open area behind the grill and I wanted to reproduce that.
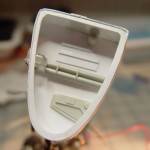
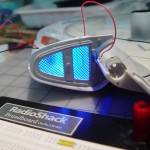
So I created a light box to go behind the warp grills and put a single 5mm white LED there, colored blue. To dress it up, I robbed the stores box, specifically pieces from a 1/48 P-51D (you can see pieces of a bazooka launcher) and an MPC X-Wing. I also made a trapezoidal piece with ribs that I thought looked right.
Chain-link fence or warp grill
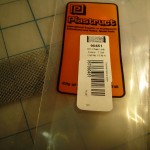
I first attempted to make the warp grill by making a lattice out of galvanized wire with the ends embedded into the kit’s styrene end cap (after drilling, cutting and filing out an opening). It actually looked pretty good, but then I discovered HO scale chain-link fence at Caboose Hobbies. Painted black, this stuff was perfect and was easy to apply. I have enough for at least ten Defiants.
I hadn’t intended to use the resin pieces for the warp grill, but I didn’t feel like removing the lattice I’d created and was happy to have the resin pieces. Were I to build this model again, I’d prefer to use the styrene pieces with the openings cut out, because then I would be gluing styrene to styrene instead of resin to styrene.
I found that using the paint suggestions from the model’s instructions were close, but the Insignia Blue was too strong. In low light, however, the colors look closer to what I saw on screen.
Scribing
I decided to scribe the paneling on the ship, both to match the studio model and for the practice. Also, I wanted to sand the surface of the model to get crisper detail. It was very tedious, but I think the final results are worth it.
There’s no weathering in space
I tried to weather the model, but I just couldn’t do it. I used a dark grime Flory wash, but removed almost all of it. It’s just too pretty a model to grunge it up.
Lighting
I went minimal with the lightning. There are six-LED strips in the warp nacelles, and a three-LED strip in the nose and one just forward of the plastic tube that keeps the upper and lower halves of the hull stable. There are red LEDs in the impulse engines and a red and green LED in either nacelle for the running lights on the sides of the ship. Fiber optics carry the light to those beacons. A single 555 strobe lights a white LED, with fiber optic running to each strobe location.
I did sort of use the Raytheon effect to back light the eight blue circle things and the two red areas (with the little ladders). I just masked off those areas and didn’t paint them, both on the outside and the inside of the model. I sprayed transparent blue and red paint. The effect is pretty subtle, but I like it.
Painting/Decals
All paints were ModelMaster Acryl. I used a PFM coat before decaling. The decals with the model are pretty good, but they don’t soften much, even using SolvaSet. They do take a really long time to wet before they’ll release from the paper.
I used my Neo for Iwata airbrush and as usual had varying results. When it worked well, it was a dream, but when it didn’t work, it was a nightmare. Getting the balance of paint, thinner, retarder, air pressure and having an absolutely spotlessly clean air brush is a near impossible task for me.
What I learned
I hope I’ve finally learned to only use fiber optics as a last resort. It’s much more dependable to use LEDs instead, considering the number of times I broke a fiber or accidentally melted one with hot glue. I learned to thoroughly lube the airbrush before every use. I have seen the wisdom of using Testor’s Universal Acrylic Thinner and Cleaner when using their paints. I’ve also learned that Bondo is amazing. I can see why many rely on it. I learned that Frog tape works almost as well as Tamiya masking tape (it’s a little more opaque, which can be a drawback when trying to trim to panel lines) and is cheaper. It’s certainly ideal for masking off large areas.

