
Sofa-futon finished
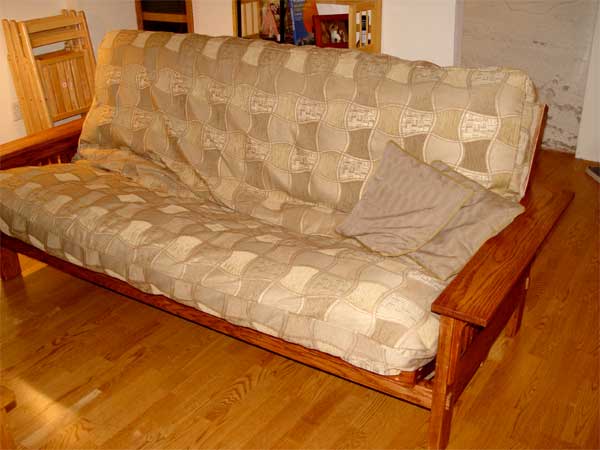 I’ve finished the sofa-futon and despite a motley collection of wood (some ancient oak plywood, some new oak plywood, and solid oak for the armrests) and perhaps a too dark stain (Minwax Red Oak) and a runaway router, I think it turned out all right.
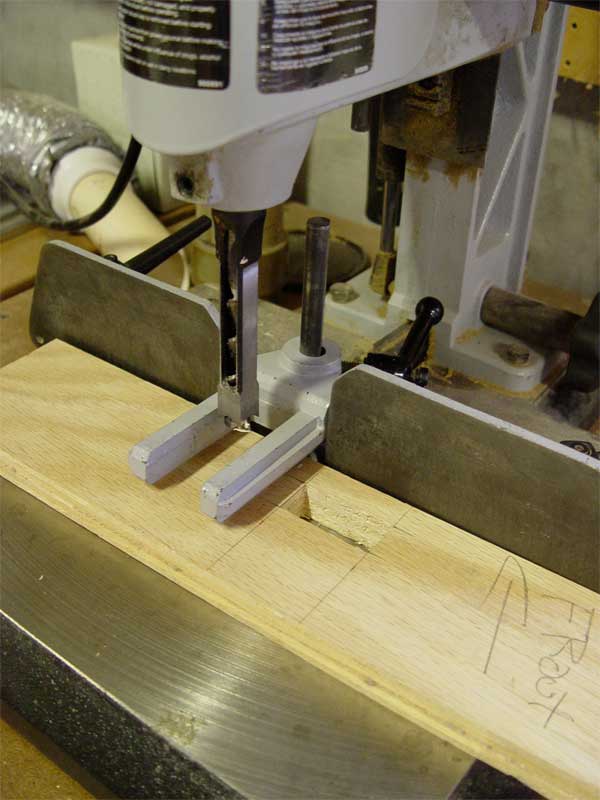 But I should back up and continue from my previous post, where I was about use my mortiser to drill the square holes that will accept the through tenons from the rails that hold the two legs/armrests together. I bought the Delta mortiser early on when I first started my woodworking. Arts and Crafts furniture involves a lot of tenons, and the idea of using Forstner bits and chisels to make those square holes was not appealing.
The job was further complicated by my bright idea to show through tenons; that is the end of the tenons would go all the way through the legs and stand proud of the surface. Which created two problems: one, I didn’t want tearout when the mortising bit went all the way through the legs and two, since I built up my rails of laminated plywood, there wouldn’t be any pretty solid oak tenons. Yes, a lot of my problems arose from my decision to use plywood rather than solid oak, but it cut the cost of the project by at least two thirds.
I solved the first problem by cutting the mortises on each of the two pieces of plywood that make up the legs (remember that the legs are actually two 3/4″ pieces glued together). That way the outer face of the legs should always have a clean edge. The faces with tearout would be the faces that are glued together. And yes, that meant I had eight mortises to cut instead of four and yes they didn’t align perfectly.
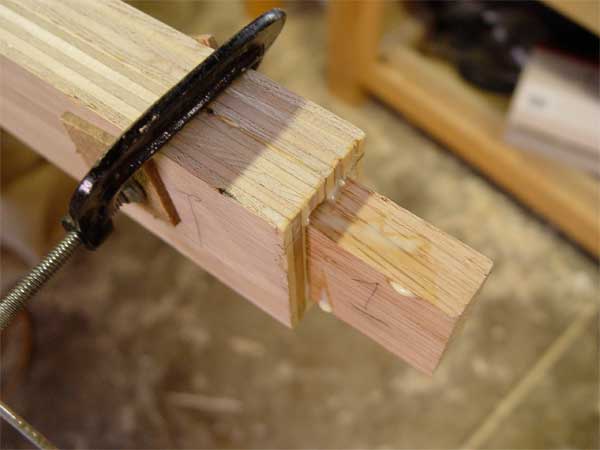 The second problem had me stumped until I came up with the idea of prosthetic tenons. I cut just the tenons from solid oak and then with a router I cut out a socket on the inside faces of the two pieces of plywood that made up the rail. That’s where the runaway router, a slight exaggeration, came up. I didn’t lock down the router collet tight enough and the bit climbed all the way through the plywood. I had to make a plug to hide the inadvertent slot, which meant that piece of plywood became the inside half of one of the rails. Fortunately the angle iron that secures the rail to the legs covers up my mistake.
 Anyway, the prosthetic tenons worked, giving me a solid piece of oak showing out the other end. All in all, my decision to use plywood instead of solid oak didn’t cause too many problems, except for all the oak veneer that I needed to hide the rough plywood edges. I used about 70 feet of veneer and at $24 per 50 foot roll, I lost some of my savings by using plywood. I also had the joy of melting the veneer onto the edges with a hot iron, a very tedious task and then trimming the excess with a chisel.
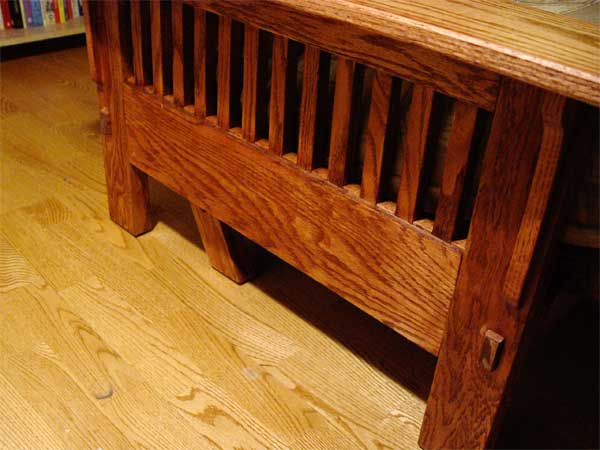
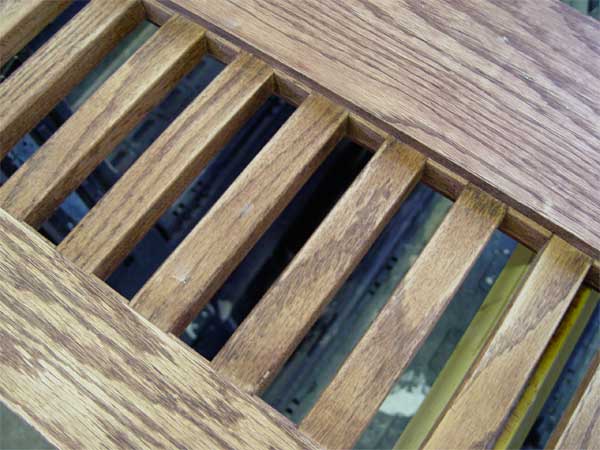 I did make several changes to the Wood Magazine plans, most notably the decision to drop the decorative wainscoting on the side pieces and instead insert 24 slats (12 per side). These 3/4″ x 1″ slats sat in a groove dado cut into the top and bottom rails of the side pieces and were separated by 1″ spacers 3/4″ wide and 1/2″ thick. That’s 52 spacers in all, if you’re counting. It’s another tedious task, but nothing says Mission style like these slats.
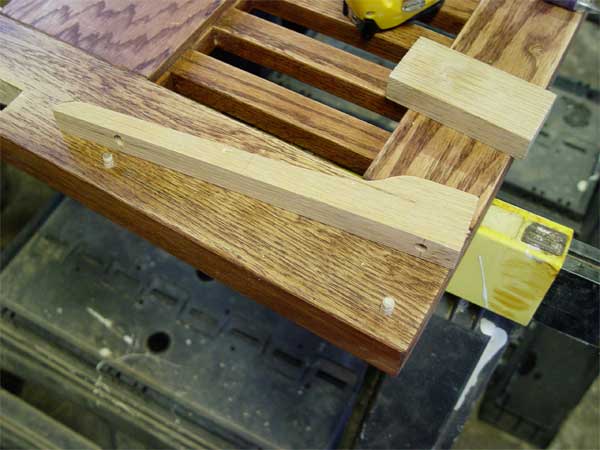 I also went with much wider armrests because they make excellent shelves for food and drinks (with coasters of course). But I wanted to add Arts and Crafts style corbels (cut on the bandsaw) that would help support the wider armrests. Both the armrests and corbels are held in place with dowels and then glued.
The plans are excellent, although I would appreciate it if more cumulative measurements were included. In some cases, trying to figure out where to drill some holes required adding lots of small distances. I’m glad I have my fractional calculator.
The frame also folds out very easily, thanks to some beeswax I put in the tracks, and it also locks into position quite firmly. It took me about two weeks to build and once we bought the futon, it makes a very comfortable couch. I wanted to raise the height of the side pieces, and I’m glad I didn’t. I don’t think the method by which the rails are held in place with the angle iron and the hangar bolt would work as well if the side pieces were taller.