
Workshop tour
Although I’ve had a designated room for modeling for some time, I never really made proper use of the space for a variety of reasons. Recently however, I decided to do something about. It wasn’t the easiest thing to do, but it has paid off.
My first task was to repurpose an old temporary (used during our house remodel) cabinet that was about six feet wide and 35 inches high. Think of a barebones Ikea melamine flatpack cabinet and you’ll get the idea. It didn’t match the height of my other desks and wasn’t an efficient use of storage. So I took it apart and used the materials to make an L-shaped desk that could go in the corner of my model room. You can see it in the picture below.
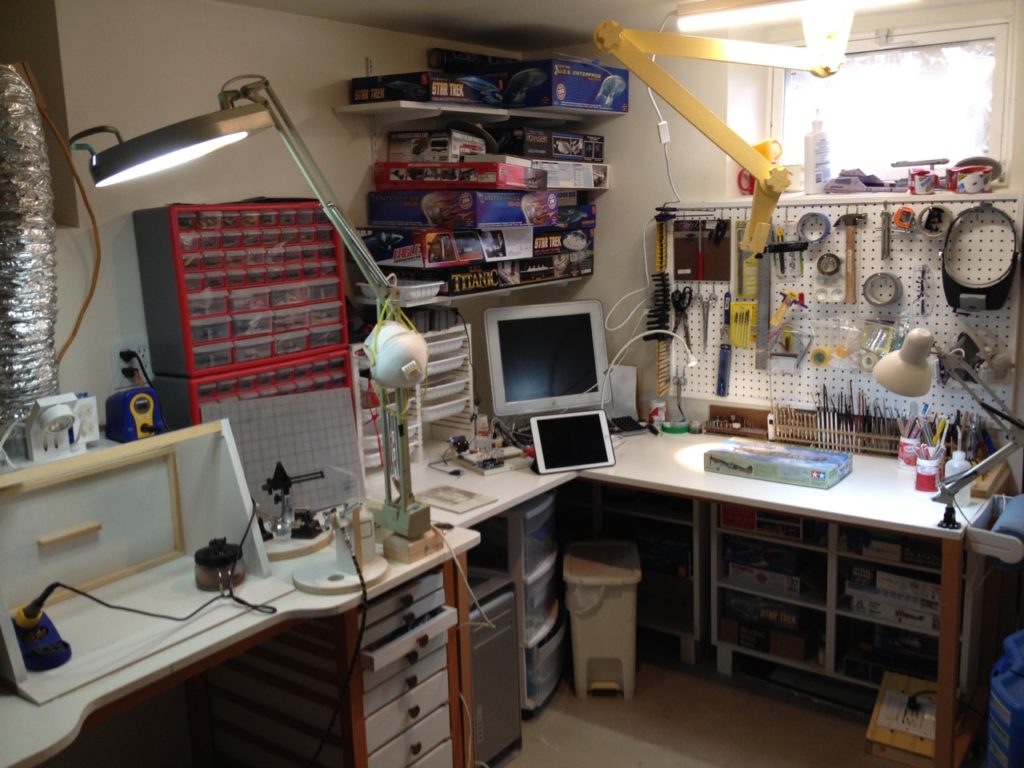
The legs for the desks (in fact for all my model room desks) are made from construction grade 2 x 4s dimensioned into two equal length 1-1/4 x 1-1/4 pieces. The pieces are joined with lap joints, screwed together and glued. It’s surprisingly sturdy and I can stand on the table. The back rails for the desk are 1-1/4 x 3-1/4. There are also crossed, lapped 1-1/4 x 1-1/4 beams that supply the “missing” leg in the corner of the “L.” These beams run the width and length of the desk and notch into the tops of the end pieces. You can just see the beams in the photo below.

Of course one problem with an L-shaped desk is the wasted space underneath, so the next task was to make these shelves that fit under the desk. There’s just enough room for my legs there. I also store the waste basket and some rolling plastic shelves there. These shelves were also built from the remains of that temporary cabinet.

After that my task was to finally build the sink I’ve always wanted in the model room. A recent hospital visit netted me one of those plastic tubs they give out. I found a drain tube without the cutout for a pop-up drain plug and placed it into a plywood top (left over from a previous project). The sides of the rolling wash stand and the slide out shelf are from the repurposed cabinet.
The sink uses two, two-gallon (old paint) tubs. The clean water is drawn from one tub with a siphon and empties into another tub. I like that I can roll this washstand from my main workbench and to my paint booth.
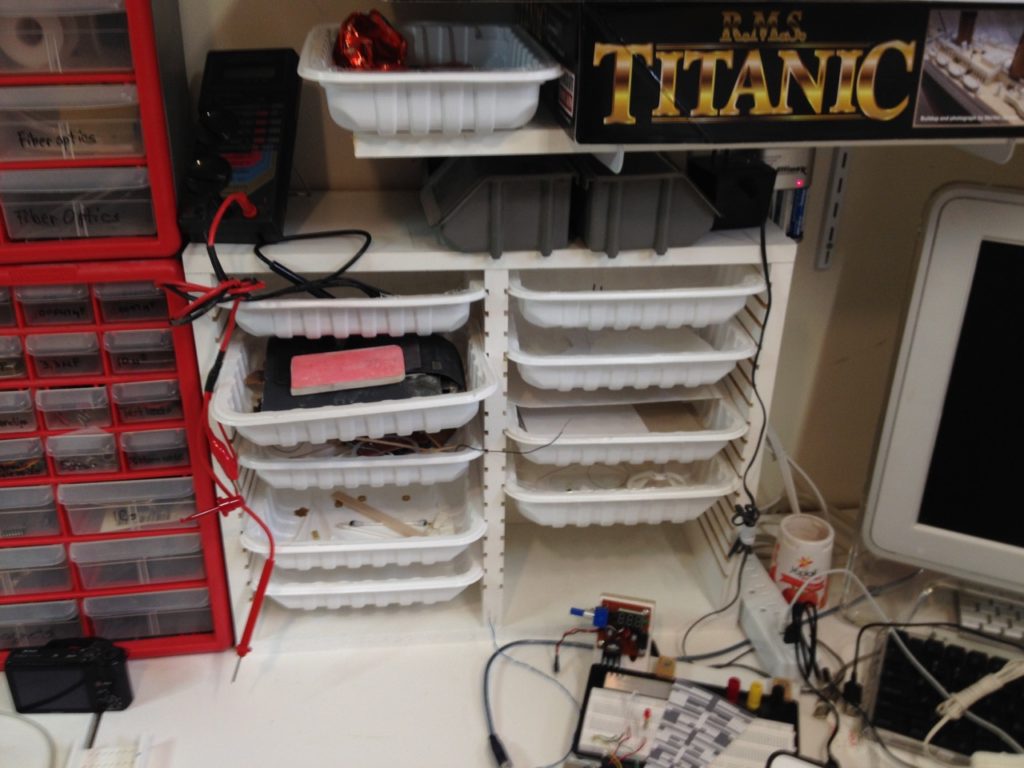
I also wanted additional storage space above the desk, so I made these little shelves to hold the plastic containers in which Red Bird chicken breasts are packed. The idea is that these containers can hold all the small parts related to current builds. Again made with left over pieces from that sacrificed cabinet.
I also decided to make a much improved spray paint booth. My previous booths were either too large or too small, and this one is just about right. The sides can swing out in case I need to spray something very long.

The booth vents straight up and there’s a cheap furnace filter just behind the door that blocks the draft during the winter. I also made that airbrush holder just off the right side of the picture. This finally finished off most of the large pieces from that cabinet, but I still have short and narrow boards for other projects.
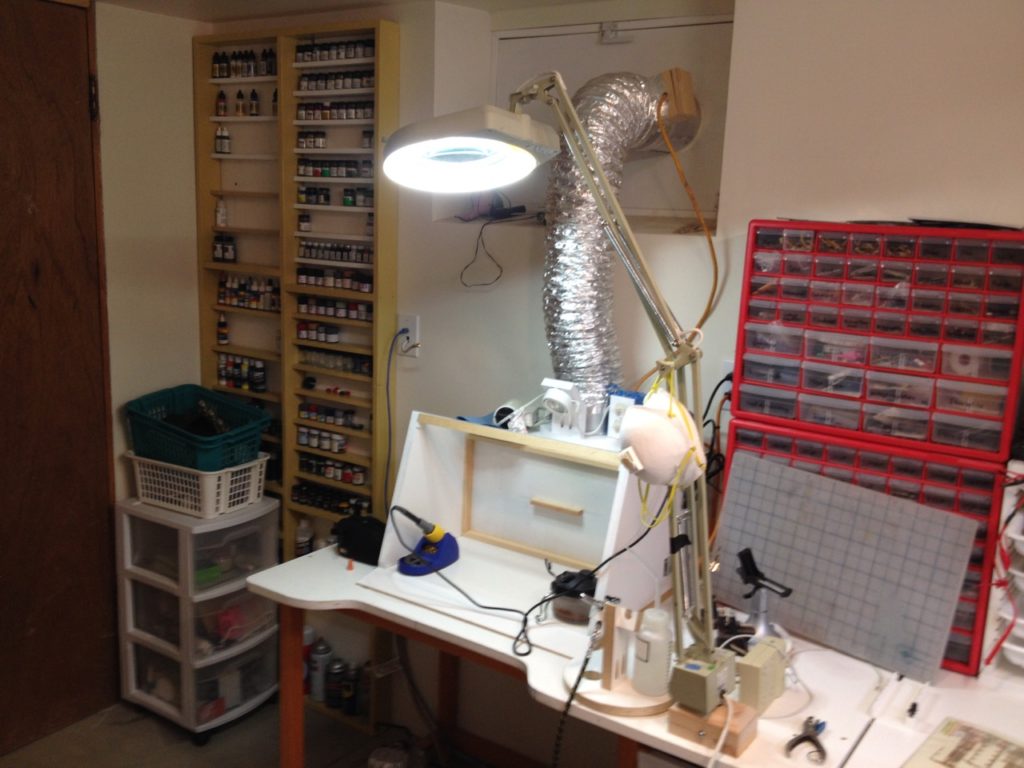
I also decided I needed better paint storage. Before I had paint shelves next to my workspace but I decided I needed more space, so I made these shallow shelves that are screwed into the studs in the walls. I dimensioned 2 x 4s down into 3/4 x 3-1/4 boards, something I’ll never do again. Any warp or bow in the studs becomes dramatically increased and some of the boards were unusable. I have another small paint shelf that sits next to another desk. (I now have three work areas.)
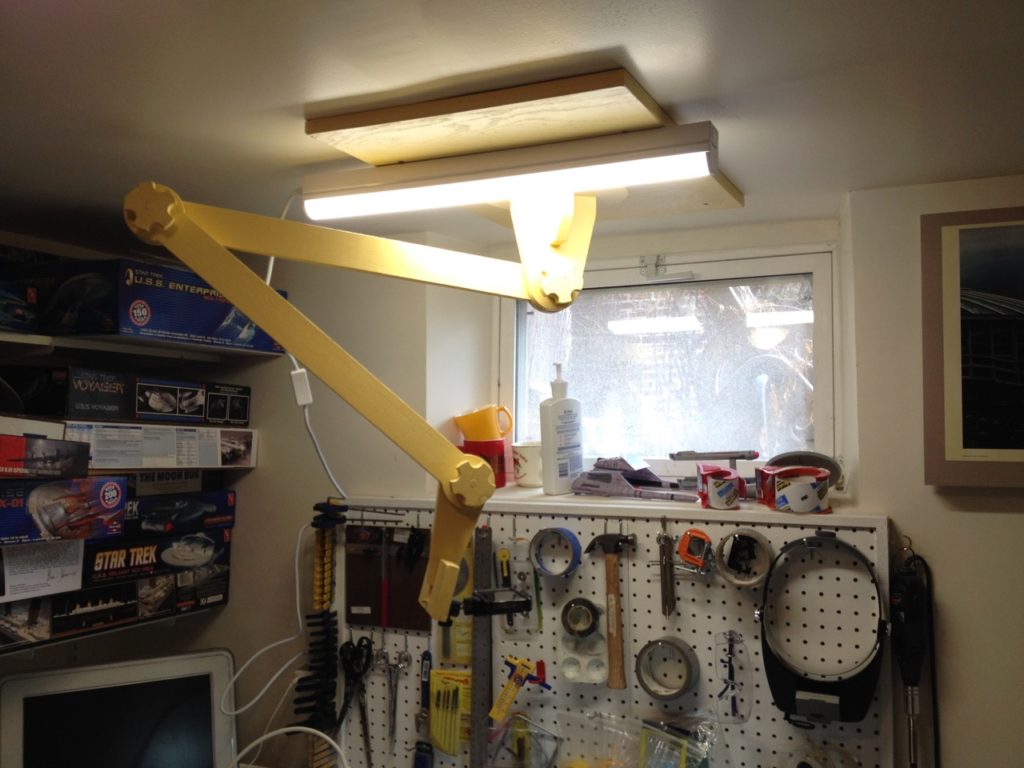
My last project was to make an articulating arm with a camera mount. This is made with leftover 3/4 plywood and attaches to the ceiling with a lazy Susan. I made star knobs (again out of plywood) to secure the 1/4-20 bolts. I used neoprene shelf liner material to provide the grip at each elbow. The arm ends in a shelf with another 1/4-20 bolt to which I can attach a camera or iPhone. This build surprised me because it went together almost exactly as I’d envisioned it.

I’ve been very happy with these improvements. I’ve limited myself to a small pegboard holding only those tools I frequently use and I’m trying to keep an open work area, but the photo above shows I haven’t really achieved this. I do have another desk that I haven’t shown (nothing remarkable) that holds stuff like really large model boxes. It’s holding the 1/350th Enterprise refit I’ve been building like forever.
I’m sure I will make minor improvements to the model room for some time. I bought an LED light strip over the main workbench and I need another above the paint booth. I also need a rolling chair so that I can easily move from one desk to another, but I’m pretty happy with my basic layout.
PS Sorry for the fuzzy photos. I used an old iPhone rather than my main camera and every time I tapped the screen I jerked it. Live and learn.